The post Cactus to Clouds Day Hike Guide appeared first on Virtual Sherpa.
]]>
Cactus to Clouds Quick Facts
Cactus to Clouds Rating: ★★★★★ (5/5 Stars)
Virtual Trail Guide: Cactus to Clouds Day Hike
Distance: 20.7 Miles
Elevation Start: 465ft
High Point: 10,834ft (San Jacinto Peak)
Total Elevation Gain: 11,000ft
Estimated Time to Complete: 12-20+ Hours
Difficulty: Strenuous What does this mean?
Class: Class 2– What does this mean?
Season: October, November, March, April, May (You can hike outside of these months but expect snow in the Winter conditions or very hot temperatures)
Weather: Planning weather is tough for this one, its smart to look up weather for San Jacinto Peak and Palm Springs so you get an idea of what it will be like up high and down low.
Crowds: Low (Crowds are higher around the Tram)
Directions to Cactus to Clouds
Trailhead: MuseumTrailhead
Getting Here: The Museum trailhead is located on the west side of Palm Springs. You can enter “Cactus to Clouds Trailhead” into your favorite navigational device. Although the hike starts here, you can’t park here. More on that below. If you plan on parking a car at the end, you would simply navigate to the Palm Springs Tram and park a car there (more on that below).
Parking: Parking for Cactus to Clouds starts right near the Palm Springs Art Museum. There are lots for the museum, but these do not allow hikers to park as the hours are limited. For free parking, you would look for spots along North Belarado Road (right near the museum). Spots are somewhat limited so be sure to plan accordingly. This is where I parked my rental while hiking in April of 2026 and had no issues while being gone for 12 hours. Be sure to read parking restrictions as street parking can change. There are no restrooms at the Museum trailhead.
If Shuttling: The best bet if you plan on shuttling cars would be to leave one at the Palm Springs Tram (there is more parking here). You do need to let security know and pay $15. Drive back to the Art Museum – about 20 minutes, to start your hike.
If Not Shuttling: If you are hiking solo or do not plan on shuttling, you have two options: Start at the Art Museum and take an uber/taxi back or park at the Tram and take an uber/taxi to the start. The cheaper option would be to park for free at the start and take an uber back. This avoids the Tram parking fee.
Either way, expect to spend about $35 on a rideshare. There is some cell services and WiFi at the Tram so getting a ride should be no problem. I was able to find a ride in about 5 minutes finishing around 8PM.
Tram: If taking the tram down, there is a $17 fee and you can walk in and buy a ticket after your hike. Be sure to NOT MISS the last tram down (generally 9:30pm), view the schedule here.
Permits/Fee: To hike Cactus to Clouds there is no fee. However, you will likely end up paying for a tram ride down which is $17 and potentially a ride back into town ($35 or so).
Summary
Dogs: Dogs are not allowed on Cactus to Clouds (the initial miles of trails do not allow dogs). Frankly, bringing a dog on this hike is really not a good or responsible idea.
Camping: Cactus to Clouds has a few options for camping:
- Along the trail – generally speaking the best spots are after 5-6 miles in or after 9 miles in. You can read more about camping here.
- There is a small cabin just below the summit that is free / first come serve and has some bunk beds. I show this in my full video guide but information online is really hard to come by.
Make it a Loop: Most hikers who attempt Cactus to Clouds make it a one way hike: tagging the summit of San Jacinto Peak then hiking about 6 miles back down to the Tram. However, if you have more energy you could easily hike around the State Park. View more hiking trails here. Feeling really energetic? Hike your way up to Canada or down to Mexico on the PCT!
Food & Water: I generally do not have a separate section for food and water on my hikes because I feel that it’s fairly obvious. However, for Cactus to Clouds I wanted to include information. Water is non-existent until you are about 10.5 miles in and check in with the State Park Rangers. Here, there are plumbing restrooms and a free hose you can use to fill up all your water bottles or bladders. After this point, there is sometimes a creek that runs for the next 2 miles or so but be sure to filter this.
Food: You are on your own for food unless you want to hike up to the Tram building and refuel 10 or so miles in. This does add about a third of a mile of additional hiking but is certainly an option if you need or want a real meal or some snacks.
Emergency Food/Water: There are two emergency food/water stations before entering San Jacinto State Park. One is at about 3 miles into the hike and another about 6 miles. Please ONLY USE THESE if you are in really bad shape or an emergency situation. In this case, DO NOT CONTINUE your hike.
Hike Tip(s): Fuel Properly + Have a GPX File
Even if you are an experienced hiker in good shape, Cactus to Clouds is a very hard hike. Be sure to fuel properly (bring lots of calories and hydration) and try to add calories or water into your system every 30-45 minutes. This will significantly help you maintain a steady pace but also keep you going for the whole day. Do not attempt this hike unless you are very experienced, prepared and in good shape. Cactus to Clouds has caused SEVERAL rescues and even some deaths (about one per year).
Having a .gpx file will help you the entire day but especially the first 7-8 miles when the trail can be confusing. There are several trail junctions and social trails that can be easy to find and get lost. I have a really good sense of direction and plenty of experience route finding and was referencing my map for the first 5+ hours of this hike. Download my gpx file below.
Trail X Factors: Weather + Elevation
This hike can get really hot and really cold, often on the same day. Preparing yourself for hours in the sun but also hours in the cold is vital. Be sure to plan your day around the weather and more importantly pick a good weather day.
Any time the trail gains over 10,000ft of elevation in a single day, this is going to really test your legs and lungs. Take your time and most important, find a pace that you can sustain for 10+ hours. Cactus to Clouds is the definition of “this is a marathon not a sprint.”
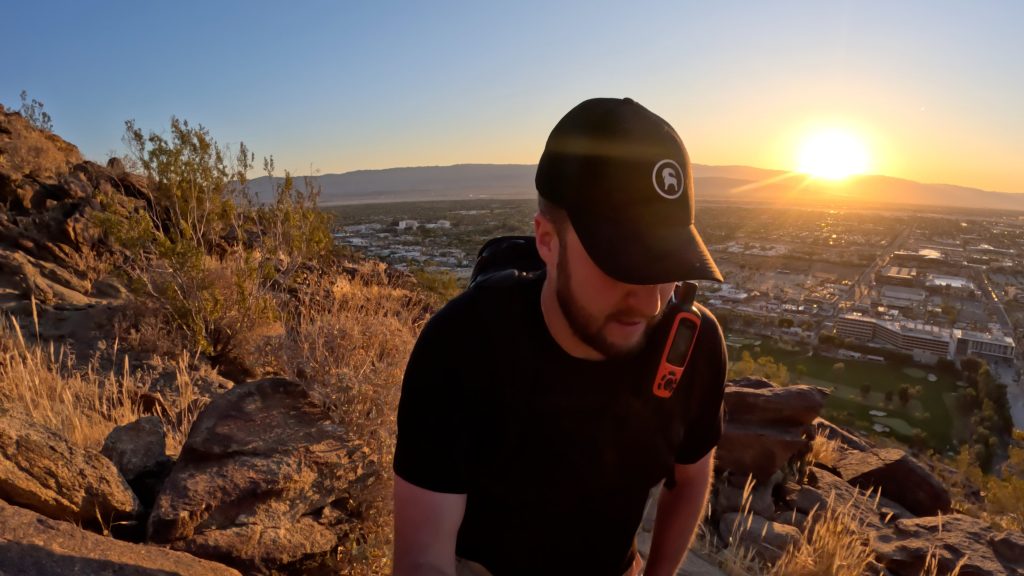
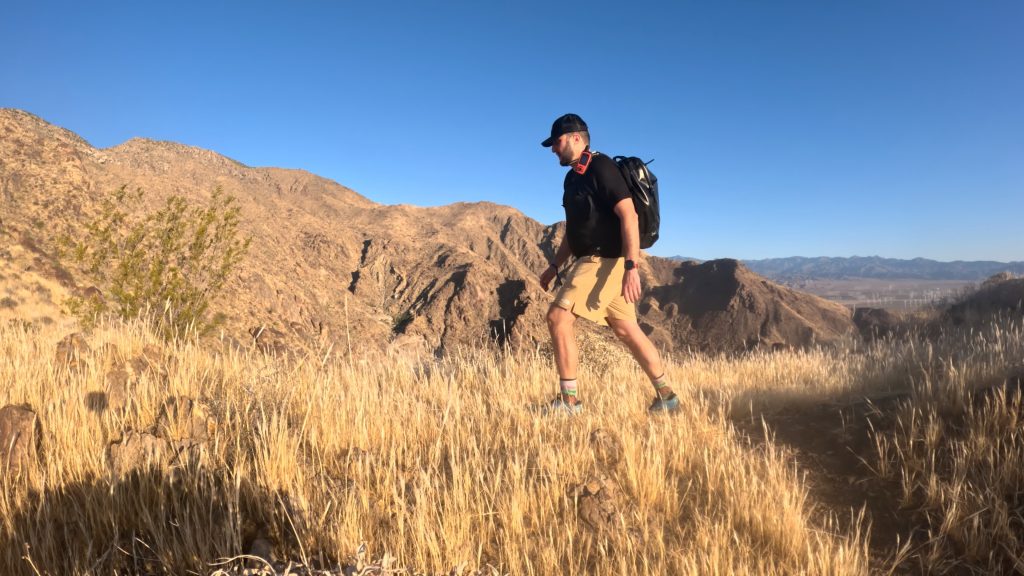
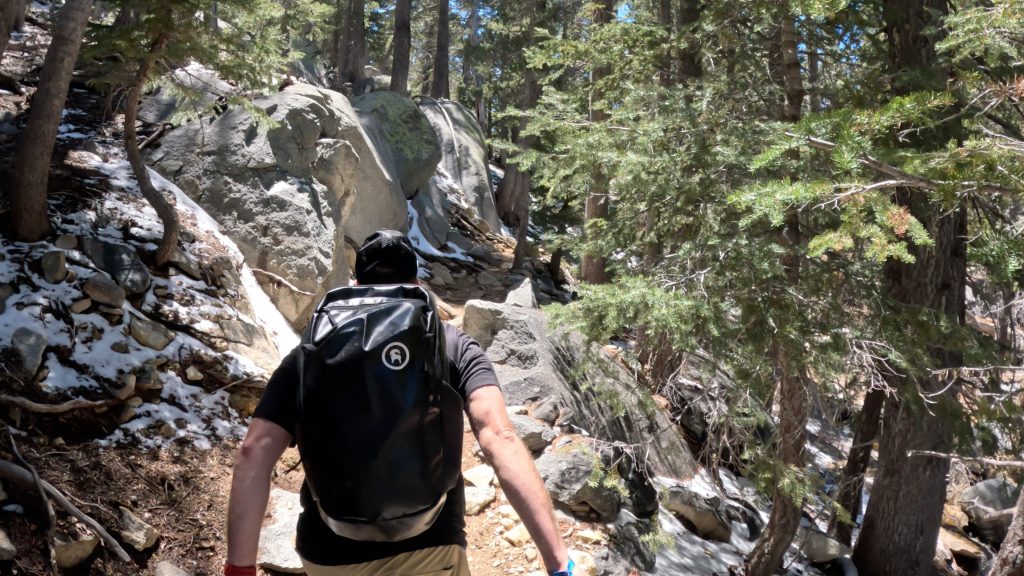
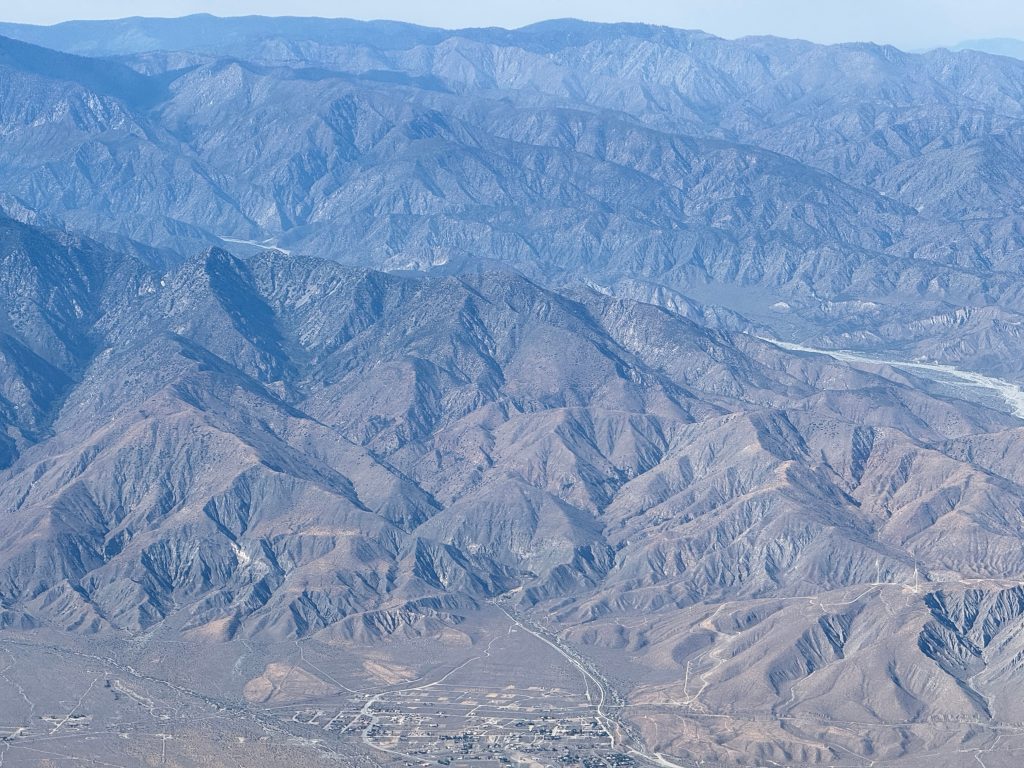
Best Views: Cactus to Clouds really delivers on views almost the entire time. The only section of this hike that was “boring” was a few miles in the trees after leaving the Tram area. Besides that, views are unique and so different almost each hour you are traveling the trail. Its so unique, in my experience, to stand on a summit of a mountain and be able to look 9,000+ ft down to the start. This almost never happens on hikes, at least here in the US. Be sure to soak it all in!
Gear Needed
- Sunglasses
- Running Vest
- Running Vest (Larger)
- Sun Hoodie
- T Shirt
- Jacket
- Running Shorts
- Hoka Mafate 5
- Hoka Speedgoat
- Hoka Challenger 7
- Running Nutrition
- Water Filter
- Water Soft Flask
- Watch
- Heart Rate Monitor
- Hiking Poles – 120CM
- Sun protection
- Water (I recommend carrying at least 2L)
- Food (I recommend carrying 200 calories per hour you think you will be out there)
- Optional: GoPro, Joby Tripod, Selfie Stick, GoPro Max 2, Drone, Insta360 *Links included in this description might be affiliate links. If you purchase a product or service with the links that I provide I may receive a small commission. There is no additional charge to you.
Cactus to Clouds Hike Route
Parking: The parking lot for Herman Gulch is massive and since you are doing a snow climb or ski descent, you should be starting early and parking will not be an issue. As of 2026, there are no restrooms at the trailhead.
Fees: None
Summary
Camping: Camping for Snoopy’s Backside is non-existent unless: you want to sleep in your car at the trailhead (always sort of a risk as its not technically allowed) or travel about 2 miles up the trail to find level camping in the basin.
Dogs: I never recommend bringing a dog up any couloir or snow climb.
Make it a Loop: The most popular way to extend your day on this line would be to do one of the following:
- Climb Snoopy’s backside and then descend the south facing line (Snoopy’s Collar) then re-climb and exit down Snoopy’s Backside couloir.
- Climb and ride Snoopy’s Backside and then get some more laps on the nearby Northern facing bowl on The Citadel.
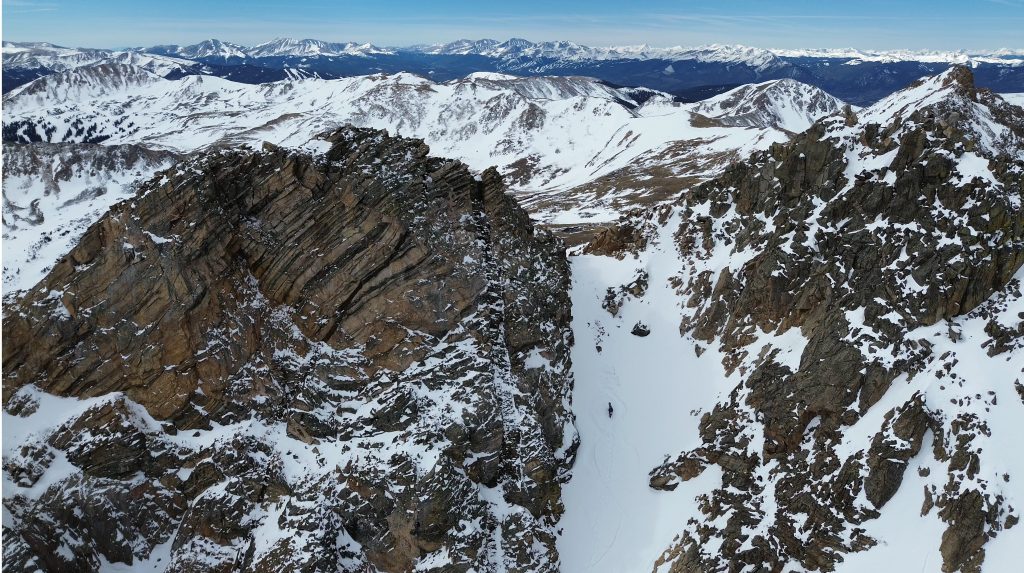
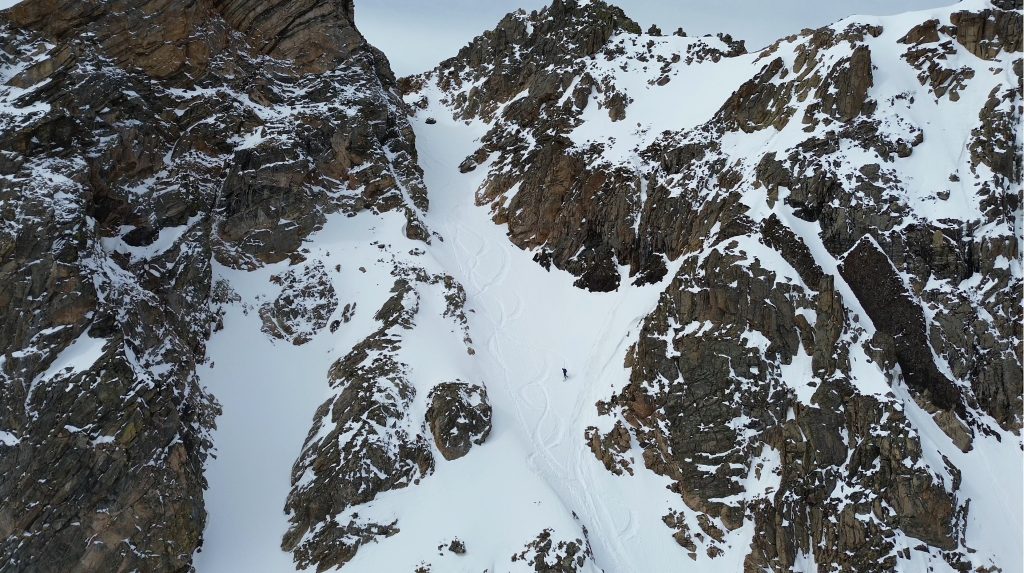
Trail X Factor: Approach/Exit
The approach could probably be the X Factor on every single ski line that I have on this site (or exists in general). Herman Gulch is much lower in elevation and exposed to the sun so the first 2 miles will melt out (or just not keep snow) as the Spring progresses. I have approached this line three times, in three different months and each approach has required hiking for at least a half mile before popping on the skins.
Obviously, it’s the same route as the way in but when you are heading back to the car, try to follow the creek as long as you can as this will save you lots of bushwacking, postholing and will allow you to ski the most continuous line of snow out.
Hike Tip(s): Tagging the Summit
After climbing the couloir, if you want to snag the summit of The Citadel, there is a short Class 4 section before the final Class 2 or 3 scramble to the summit. Since this could be covered in snow, I would leave your skis/board at the top of the line but keep your axe and crampons on to make life easier.
Best Views: This line is fairly beautiful from the time you get up into Herman Gulch to the time you get onto the top of Snoopy’s Backside or the summit of The Citadel.
Gear Needed
- 14er Day Hike Packing List
- Winter Backpack
- Hiking/SkiPoles
- Headlamp
- Climbing Helmet
- Mountain Axe – Petzl EVO
- Mountain Axe – Black Diamond Raven – Great for Beginners
- Crampons
- Crampon Bag
- Snowboard Boots: Deeluxe Spark Fusion
- Snowboard Boot Crampons
- La Sportiva Mountaineering Boots
- Snowpants
- Gloves
- Microspikes
- Gaiters
- Optional: Avalanche Gear: Beacon, Probe, Shovel
- Optional: Snowshoes
- Optional: Skis or Splitboard
- Optional: Goggles
- Optional: Garmin inReach
- Optional: Garmin Fenix Watch
- Optional: GoPro, Joby Tripod, Selfie Stick, GoPro Max 2, Drone, Insta360
- *Links included in this description might be affiliate links. If you purchase a product or service with the links that I provide I may receive a small commission. There is no additional charge to you.
Snoopy’s Backside Route
*Please note that I approached this on the standard trail longer than you might need to depending on snow coverage.
Parking: The East Mt Falcon lot is extremely popular but since you will likely be starting early on the Mini Falcon Punch, you shouldn’t have any issues with securing a spot. There are non-plumbing restrooms at the TH. If the lot is full, there is additional parking along nearby roads. You could also pivot and park in Morrison and just start/end your day in a slightly different spot.
Permits/Fee: $0 and no permit as of 2026
Summary
Dogs: For a fit dog, this is a dog friendly loop. However, since it can get quite hot, be sure to bring lots of water.
Camping: Camping is not allowed in the area and even if it were, camping options on this hike are essentially non-existent. Seek alternative lodging.
Make it a Loop: This is a loop! If you wanted to extend it, there are literally endless options (adding on Red Rocks, other trails in these parks, running over to the Dino ridge etc.)
Water Sources: Water is scarce on this route. Your best option is to fill up at the creek that runs through Little Park. Before and after this point, you will not come across a consistent water source.
Trail X Factors: Road Sections
About 80% of the Mini Falcon Punch loop is on dirt trails but 20% is through residential areas and on paved roads. This includes two very small sections that are technically on private property. The access road on Mt Morrison has sections owned by private individuals, please travel through this area with respect, leave no trace and move as quickly as you can. The worst road section, in my opinion, is the stretch from Pence Park to the West Entrance of Mt Falcon. It seems to go on forever and has a decent amount of climbing here.
Hike Tip(s): When running the Mini Falcon Punch loop, pick a day with lower temperatures or higher cloud coverage and be sure to start early. There is A LOT of sun on this loop but you can time it correctly to get areas of shade until 12PM ish. As mentioned above, there are no areas to stop and get food/drinks to be sure to pack what you need and refuel before leaving the creek that run through Little Park.
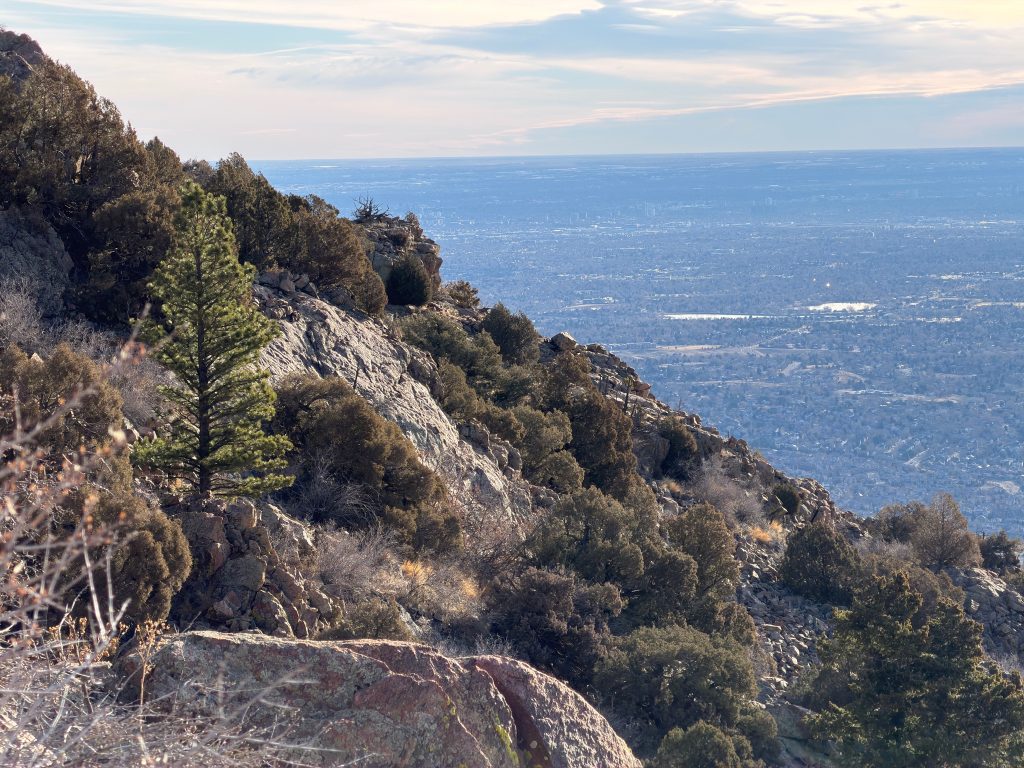
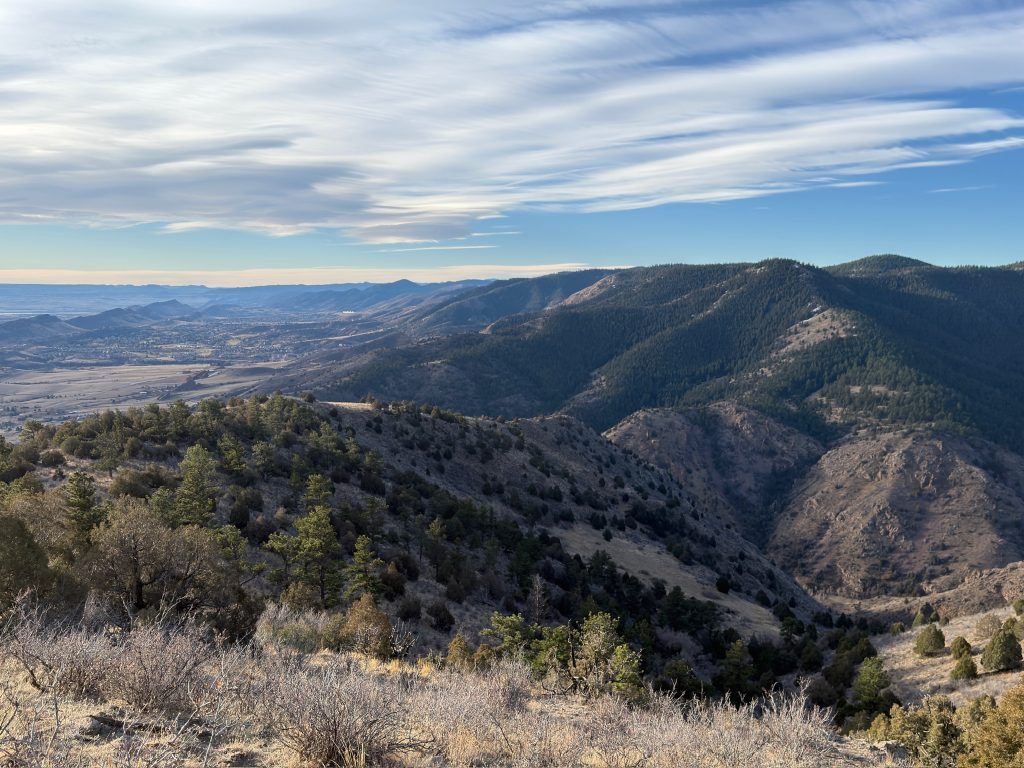
Best Views: In my opinion, the views from Mt Morrison, Panorama Point and Mt Falcon Summer White House overlooks are the best on this loop.
Gear Needed
- Sunglasses
- Running Vest
- Running Vest (Larger)
- Sun Hoodie
- T Shirt
- Jacket
- Running Shorts
- Hoka Mafate 5
- Hoka Speedgoat
- Hoka Challenger 7
- Running Nutrition
- Water Filter
- Water Soft Flask
- Watch
- Heart Rate Monitor
- Hiking Poles – 120CM
- Optional: GoPro, Joby Tripod, Selfie Stick, GoPro Max 2, Drone, Insta360
- *Links included in this description might be affiliate links. If you purchase a product or service with the links that I provide I may receive a small commission. There is no additional charge to you.
Mini Falcon Punch Loop Route
Parking: There is a small parking lot that can fit 20-25 cars and has a non-plumbing bathroom. I can’t speak to how quickly this lot will fill up on busy days but can say there are not additional areas to park once the lot is full.
Permits/Fee: $0 and no permit as of 2026
Summary
Dogs: I would strongly advise against bringing a dog on the Goldstrike Canyon hike.
Camping: Camping is not allowed in the area and even if it were, camping options on this hike are essentially non-existent. Seek alternative lodging.
Make it a Loop: The Goldstrike Canyon trail is an out and back hike. However, allow for plenty of time to explore near the river as there are plenty of, steamy, hidden secrets…
Trail X Factors: Fixed Ropes & Bacteria in Water
During the trek down to Colorado River, the Goldstrike Canyon hike will have 7-10 areas where a fixed rope has been put in place by other hikers. Although these ropes are necessary for almost every hiker to descend and ascend the section, I would not fully trust them. When using these ropes, I would HIGHLY recommend testing them prior to using and when using, not putting all of your body weight into them in case they do fail.
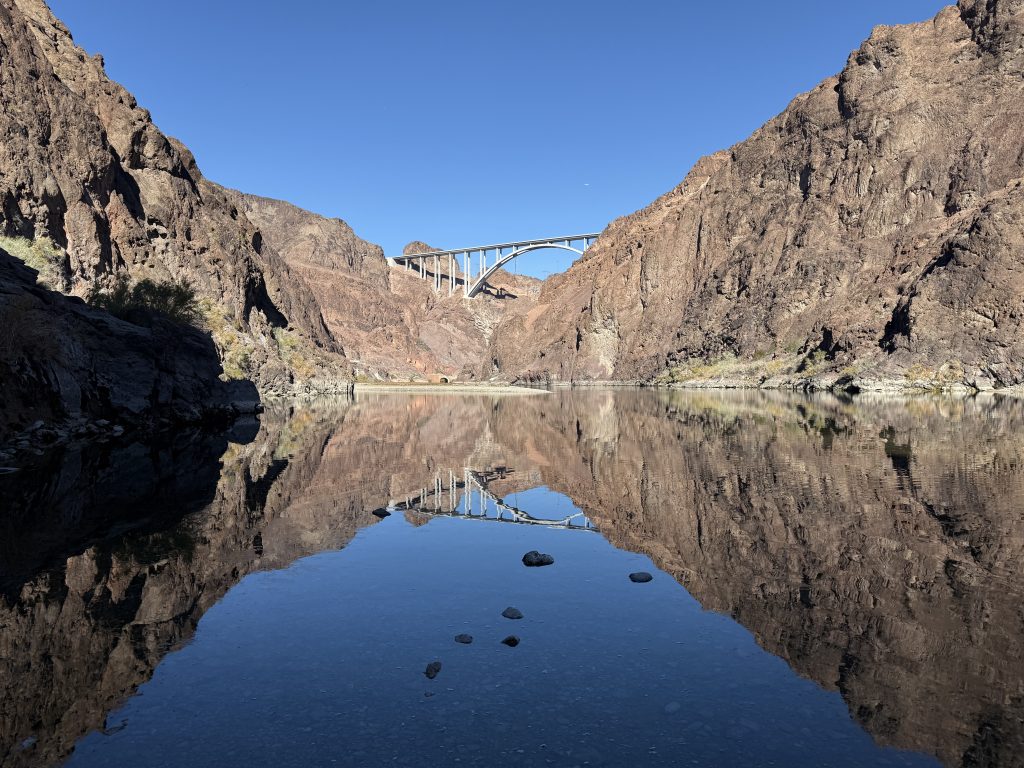
Once at the Hot Springs and with the water in general, it is NOT recommended to let the water into your eyes or mouth, including filtered drinking. Past tests have shown high amounts of fecal coliform, E. coli, and enterococci.
Hike Tip(s): The best tip(s) for Goldstrike Canyon Hot Springs hike would be to hike down the river and explore a lot. There are several areas of Hot Springs and a Steam Cave that can be accessed at the end of the hike. I will not get into details on this blog to keep some things hidden and require a bit of exploration.
Best Views: In my opinion, the views on Goldstrike Canyon Hot Springs get better the closer you get to the river. Once you leave the loud sounds of the interstate behind, the seclusion into nature is pretty great.
Gear Needed
- Men’s Trail Runners
- La Sportiva Cyklon
- La Sportiva Trango Hiking Boots (Men’s)
- Backpack (Summer)
- Sunglasses
- Base Layers
- T Shirt
- Mid Layer
- Rain Jacket / Shell
- Pants
- Shorts
- Socks
- Food & LOTS of Water
- Optional: Bathing Suit & Towel
- Optional: Water Filter
- Optional: Garmin inReach
- Optional: Hiking Poles – 120CM
- Optional: Headlamp
- Optional: Garmin Fenix Watch
- Optional: GoPro, Joby Tripod, Selfie Stick, GoPro Max 2 , Drone, Insta360
- *Links included in this description might be affiliate links. If you purchase a product or service with the links that I provide I may receive a small commission. There is no additional charge to you.
Goldstrike Canyon Hot Springs Hike Route
*As with most canyons, the GPS pinged off the wall quite a bit on my tracker.
Parking: There is a parking lot located at the trailhead that can fit about 50 vehicles. There is also a non plumbing bathroom here as well. From my experience, parking was easy to come by, but during the busiest times of the year or week, I imagine that this lot can get competitive to find spots.
Permits/Fee: $20 and timed entries are encouraged/sometimes required for October 1st to May 31st. Read more about fees for Red Rock Canyon here.
Summary
Dogs: Although dogs are allowed in Red Rock Canyon, I would not recommend Bridge Point for dogs. Having to navigate the initial drainage with a dog would be extremely annoying and tedious, especially with them on a leash. Add on the likely high temperatures; I would leave your pup at home for this one.
Camping: Red Rock canyon offers two forms of camping: through a campground or dispersed (backcountry) camping above 5,000ft in the park. Read more about that process and various options here. Along this hike itself, I truly did not see any suitable options for camping.
Make it a Loop: Bridge Point is an out and back hike with the ability to add on Bridge Mountain with a bit of back tracking. I was not successful in doing this but I believe you have to backtrack to basically the exit of Fern Canyon and then climb to the left vs following cairns to the right.
Trail X Factors: Navigation
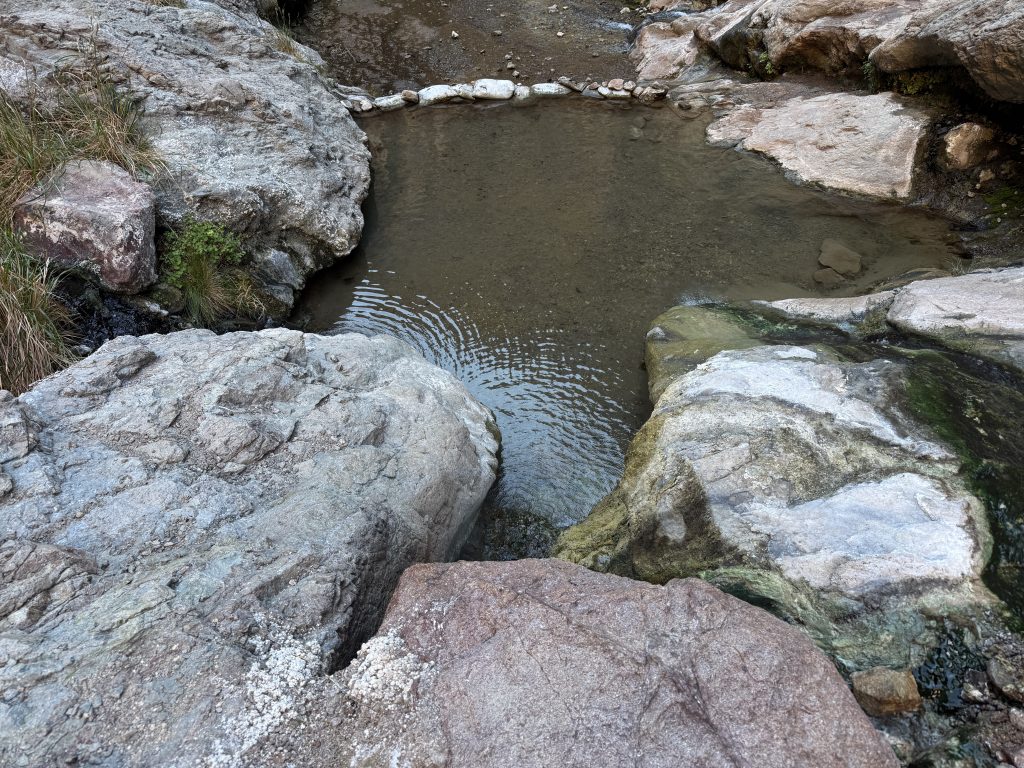
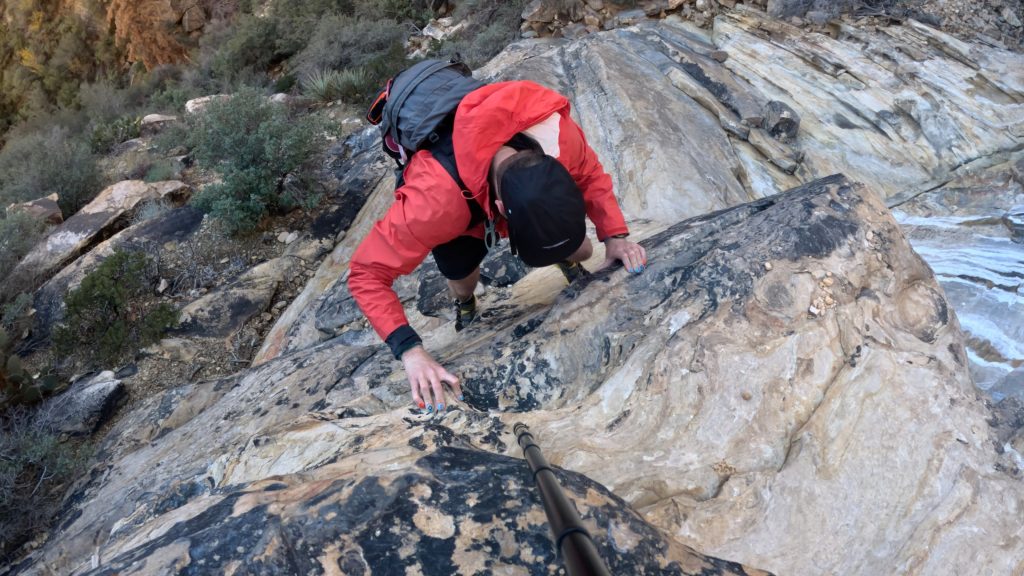
Almost the entire hike up to Bridge Point is not on an official trail and involves A LOT of route finding. Fern Canyon is dense, tedious and slow going and that is when water conditions are low. Although the general goal is to follow the creek until it ends, there are a handful of sections that require you to leave the creek as the difficulty of the climbing exceeds most hikers’ skill level.
Once above the canyon, there are plenty of cairns to follow but there are also a handful of objectives along the way and it’s dangerous to always assume they are leading you the “right” way. My biggest advice is to have a .gpx track to follow AND know the general direction where you want to head. It can be very easy, even with all of the cairns, to get off route on this hike. Be sure to follow the same way down as you went up. There are PLENTY of spots where you could get cliffed out.
Hike Tip(s): Along Creek: Give yourself plenty of time to navigate the section of trail along the creek. When in doubt, stay low as it can be easy to get cliffed out above. After you climb up past the waterfall, you will have to leave the creek at least once but be sure to go back down as you will likely get cliffed out.
Above Creek: BE SURE to follow the correct start to this hike once you leave Fern Canyon. This starts by following the cairns that lead you out of the drainage to the right. If you find yourself going more towards the left, you are likely following the “trail” to Bridge Mountain and you will not be able to tag Bridge Point without backtracking. Additionally, since there is A LOT of trail finding this entire hike (near the creek and up on the slopes) I would highly recommend having a .gpx to follow.
Best Views: I fully admit that the desert is still very foreign to me and things that some may find boring, I find beautiful. Having said that, I think that the views offered on the hike up to Bridge Point are objectively beautiful for almost the entire hike. The vast canyon behind you as you scramble of the red rock does not get old. From the summit of Bridge Point, you can see Las Vegas and most of Red Rocks Canyon Preservation area. Behind you the Spring Mountains (sometimes snow coated in the Winter months) are magnificent to look at.
Gear Needed
- Men’s Trail Runners
- La Sportiva Cyklon
- La Sportiva Trango Hiking Boots (Men’s)
- Backpack (Winter)
- Backpack (Summer)
- Sunglasses
- Base Layers
- T Shirt
- Mid Layer
- Rain Jacket / Shell
- Pants
- Shorts
- Socks
- Food & Water
- Optional: Water Filter
- Optional: Garmin inReach
- Optional: Hiking Poles – 120CM
- Optional: Headlamp
- Optional: Garmin Fenix Watch
- Optional: GoPro, Joby Tripod, Selfie Stick, GoPro Max 2 , Drone, Insta360
- *Links included in this description might be affiliate links. If you purchase a product or service with the links that I provide I may receive a small commission. There is no additional charge to you.
Bridge Point Hike Route
*As you can tell, I got lost a lot on this hike…however, my route up to Bridge Point was fairly direct and I feel confident sharing this with you. Ignore all of my indirect hiking after I tag the summit…